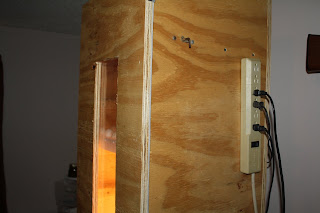
The dimensions are 17"X17"X 4'. I used 3/4 " plywood and after cutting and screwing the box together the inside should be 15 1/2" X 15 1/2". This is the size of one of those egg turners and it fits perfect.
The 1"X2" rails on the side that hold the turners are 6" apart and 8" down from the half shelf.
I calked all joints and put foam around the door with three latches to keep it air tight.
 The heating element and thermostat in the top is from an old foam incubator I had. The fan is from the wife's bathroom. The half shelf is 8" from the top and holds the fan and the water bowl. I drilled two 1" vent holes behind the fan and screwed a small piece of scrap wood on the back to be able to open and close the vent holes for the humidity control.
  I did not have any thick plexiglass so I doubled up two-1/8" pieces by using calking between the wood and the first piece, then calking between the two plexiglass pieces then I drilled holes and screwed both to the inside of the door. You can kinda see it in the first pic.
 All the egg turner cords are ran through one of the bottom 1" vent holes. I close the holes off to increase the humidity and open to decrease it. This wood box holds 45% to 50% while the eggs are turning and I can close the vent holes and the humidity raises up to 70% to 75% for the hatching.

The 100 watt light at the bottom is wired into the thermostat. There is a 1/2 degree difference in temperature from the top to the bottom. I had two 100 watts at first but that was to much.
I also put a bowl of water in the bottom where the hatcher is to help out the humidity.
There is a chick board on the bottom so the chicks do not run out when the door is open.
For an incubator I like this one a lot. The hatching area is to small for more than one shelf at a time. This pic is of two egg turners (about 80 eggs)crowed in there. They need more space than that. I was planning to rotate and have a shelf hatching every week but I don't know it that will work due to the differences in the humidity. The chick will suffocate in the egg if the humidity is to high during the incubation process and on the other hand they will be to dry to come out of the egg if it is to low during hatching. I would like to experiment more at about the 55% to 60% range to do both but I don't want to loose a whole hatch in the process.
What I might end up doing is making another one just for hatching or I could just use the foam ones I have for that and add another shelf in this one.
This design was something I just came up with. You might call is a design build. I looked at hundreds of homemade incubators and incorporated different things all in this one.
I priced out everything new and this model would have cost around $125.00 to build without the turners. I was lucky enough to have everything on hand except the door latches.
Thank yall for the interest in this and if you need any more information on this just let me know.


looks like you are going to have to build a second one for a hatcher so you can control the humidity in both of them better but looks real good and it seems to be working
ReplyDeleteNice incubator! Cover the bowl of water with screen - new chicks will surprise you with their agility once they have dried off and can hop into shallow bowls and drown.
ReplyDeleteThanks Debbie, yes we have now used this one several times and I have made a few adjustments to the design.
Delete